Halloween is a time for spooky fun and creative decorations, and one of the best ways to set the mood for your Halloween party is with a fantastic centerpiece. A Halloween centerpiece is a special decoration placed in the middle of your table or display area. It can make your gathering look festive and exciting, and it often becomes a great topic of conversation among your guests.
In this guide, we'll show you how to create your own Halloween centerpiece step-by-step. You'll find everything you need to know about choosing materials, coming up with design ideas, and adding the finishing touches. By the end, you'll be ready to make a centerpiece that adds a dramatic and spooky touch to your Halloween celebrations. Let’s get started on making your Halloween party unforgettable.
1. Choosing a Theme

When planning your Halloween centerpiece, picking a theme is a fun and important first step. Here are some popular Halloween themes you might consider:
- Haunted House: Imagine a spooky house with eerie lights and ghostly figures. This theme can include mini haunted house models, ghost decorations, and flickering candles.
- Graveyard: Create a chilling graveyard scene with tombstones, skeletons, and cobwebs. Adding some fake fog can make it even more spooky.
- Witch’s Lair: Think of a witch’s spooky hideout with cauldrons, broomsticks, and mystical potions. You could use green and purple colors to enhance the magical feel.
- Creepy Forest: A forest full of bats, owls, and spooky trees. Use dark colors and maybe some fake spider webs to complete the look.
Choosing the Right Theme for Your Party
When picking a theme, think about what fits best with the rest of your party decorations. Here are some tips:
- Match the Colors: Make sure the colors of your centerpiece match the colors used in your other decorations. For example, if your decorations are mostly orange and black, stick with those colors for your centerpiece.
- Fit the Mood: Choose a theme that matches the overall feel of your party. If your party is more playful, a haunted house theme might be perfect. For a more serious spooky vibe, a graveyard theme could work better.
2. Gathering Materials

To create a spooky Halloween centerpiece, you'll need a few essential supplies. Here’s a list to get you started:
- Black Candles: These add a dark and mysterious feel to your centerpiece. They’re perfect for creating an eerie glow.
- Faux Cobwebs: These give a creepy, abandoned look. Spread them across your centerpiece to make it look like it's been untouched for years.
- Plastic Spiders: Place these around your centerpiece to add creepy crawliness. They help to make the scene more realistic.
- Eerie Figures: These can be small ghosts, witches, or skeletons. They act as the main focus of your centerpiece and make it stand out.
Optional Additions
If you want to make your centerpiece even more impressive, consider adding these extras:
- Glowing LED Lights: These can make certain parts of your centerpiece light up and create a spooky atmosphere. Place them behind objects to highlight them.
- Spooky Sound Effects: Sounds like howling wind or creaking doors can make your centerpiece even scarier. Use a small speaker to play these sounds.
- Themed Tablecloths: A Halloween-themed tablecloth can tie everything together. Choose one with designs like ghosts, pumpkins, or bats to match your theme.
3. Creating the Base Structure

To start your Halloween centerpiece, you need a strong base to build on. Here’s how to choose and set up your base:
Choosing the Base
- Trays: Flat trays are a simple choice for a base. They’re great for spreading out decorations and easy to find.
- Pedestals: Pedestals are raised stands that make your centerpiece more eye-catching. They work well if you want to add height to your display.
- Cake Stands: Cake stands can add a fun twist and give your centerpiece a tiered look. They’re perfect for stacking items or creating different levels.
Pick a base that fits the size and height you want for your centerpiece. Make sure it’s sturdy enough to hold everything you plan to add.
Building the Base
- Prepare the Base: If you’re using a plain base, consider painting it or covering it with themed materials like Halloween-colored fabric. This will make it blend in with your overall design.
- Secure Decorations: If your base needs to be more stable, attach items like foam or cardboard to the bottom to make it less likely to tip over. You can glue or tape these materials in place.
- Add Themed Touches: Decorate the base with elements that match your theme. For example, if you’re going for a haunted house look, you might cover the base with dark, spooky fabric or add mini gravestones.
4. Assembling the Centerpiece
Now it’s time to put your Halloween centerpiece together! Follow these steps to arrange your decorations and add those spooky details:
Arranging Main Elements
- Place Focal Items: Start by positioning the main items like candles, figurines, or any standout pieces. Decide where you want the focus to be and place these items first. For example, if you have a spooky ghost figure, put it in the center to draw attention.
- Balance and Proportion: Make sure everything looks balanced. Don’t crowd one side with too many items. Spread out your main elements evenly so the centerpiece looks full but not cluttered. Think about height as well—mix taller items with shorter ones to create a nice visual flow.
Incorporating Spooky Details
- Add Spooky Touches: To make your centerpiece extra creepy, add details like faux blood, cobwebs, or motion-activated props. For instance, drape faux cobwebs over the corners of your base or use spooky sound effects to surprise guests.
- Strategic Placement: Place these spooky details in spots where they will stand out but not overpower the main elements. For example, tuck faux blood around the base of figurines or let cobwebs cascade over the edges of your centerpiece. Position motion-activated props where guests are likely to get close so they get the full scare effect.
5. Adding Finishing Touches
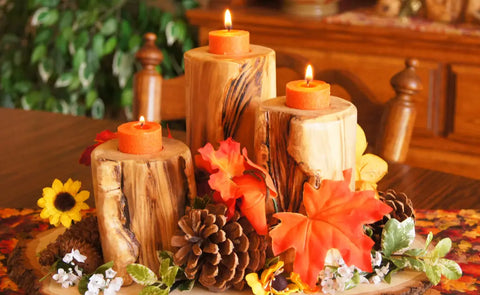
Your Halloween centerpiece is almost complete! Now it's time to add those final details that will make it truly spooktacular.
Decorative Enhancements
- Add Mini Decorations: To give your centerpiece a bit more flair, consider adding mini pumpkins, skulls, or even some glitter. Place these small items around the main pieces to fill any gaps and make the centerpiece look fuller. For example, scatter mini pumpkins around the base or place a few skulls strategically where they can be seen but not overwhelm the main elements.
- Complement the Design: Make sure these additional decorations match your theme and enhance the overall look. For instance, if your theme is a haunted house, you might use old-looking skulls or vintage-style mini pumpkins. Avoid overcrowding; the goal is to accentuate the main elements without making it look too busy.
Lighting and Effects
- Use Lighting for Drama: Lighting can make a big difference in setting the mood. Use candles or LED lights to add a dramatic effect. Place candles in votive holders around the centerpiece or hide LED lights underneath to create a glow. This will give your centerpiece a mysterious and spooky atmosphere.
- Position Lights Wisely: Place your lights where they will highlight the most important parts of your centerpiece. For example, put lights behind figurines to create eerie shadows or use flickering candles for a haunted effect. Always make sure the lights are positioned safely to avoid any fire hazards.
6. Setting Up and Displaying the Centerpiece

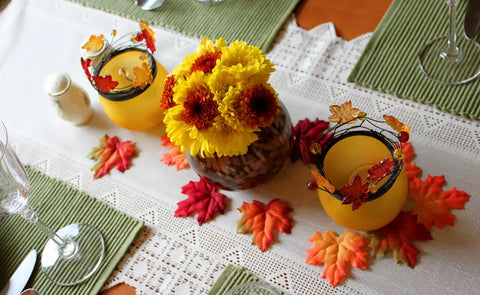
Now that your Halloween centerpiece is all set, it’s time to display it perfectly at your party!
Positioning on the Table
- Choose the Best Spot: Place your centerpiece in the center of the table or in a spot where it stands out. It should be the main focus but not block guests' views or access to the food and drinks. Make sure everyone can still see and reach everything they need.
- Avoid Obstruction: Arrange the centerpiece so it doesn’t get in the way of conversations or dining. You want it to be eye-catching but not to make it hard for guests to interact or enjoy the party.
Creating a Cohesive Look
- Match Other Decorations: To make your party look well-planned, coordinate your centerpiece with other table decorations. For example, if your centerpiece is spooky with cobwebs and skulls, use similar decorations on the tablecloth or around the table.
- Complete the Theme: Make sure everything fits together to create a complete Halloween theme. Use matching colors and styles for napkins, plates, and cups. This helps tie the whole look together and makes your party space feel more festive.
Conclusion
Let’s wrap up what we’ve covered about creating a spooky Halloween centerpiece!
Recap of Key Steps
- Choosing a Theme: Start by picking a fun Halloween theme like a haunted house or creepy forest. This sets the tone for your centerpiece.
- Gathering Materials: Collect all the necessary supplies such as candles, cobwebs, and spooky figurines. Don’t forget optional items like LED lights for extra impact.
- Creating the Base Structure: Pick a base like a tray or pedestal and set it up to fit the size of your centerpiece.
- Assembling the Centerpiece: Arrange your main items, add spooky details, and make sure everything is balanced and looks great.
- Adding Finishing Touches: Enhance your centerpiece with mini decorations and lighting effects to create a dramatic look.
- Setting Up and Displaying: Position your centerpiece on the table so it’s visible but doesn’t block anything. Coordinate it with other party decorations for a cohesive theme.
Encouragement to Experiment
Don’t be afraid to try different themes and materials to make your centerpiece truly unique. Experimenting lets you add your personal touch and creativity, making your Halloween celebration even more memorable. Have fun crafting your spooky centerpiece and enjoy the festive atmosphere it brings to your party!
Check our collection of home party decor to add a special touch to your upcoming event or celebration. Shop now and discover unique pieces that will make your occasion unforgettable!


