Halloween is a great time to include everyone in the fun, including our pets! Dressing up your dog or cat in a Halloween costume can make the holiday even more exciting and festive. Pet costumes come in all sorts of designs, from funny to spooky, and they can add to the Halloween spirit.
However, it’s important to make sure that your pet’s costume is not just cute but also safe and comfortable. Pets, just like people, need costumes that fit well and don’t restrict their movement. They should be able to walk, play, and enjoy the holiday without feeling uncomfortable. By choosing a costume that is both fun and practical, you can ensure your pet has a great Halloween experience too.
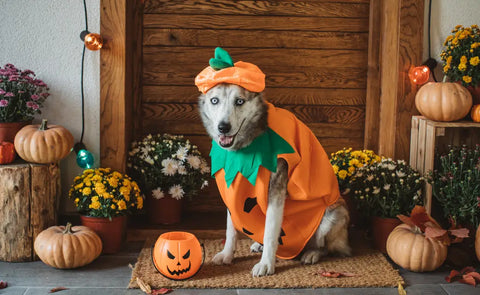
1. Classic Pumpkin Costume
Materials Needed
To make a classic pumpkin costume for your pet, you'll need:
- Orange Fabric: This will cover your pet and give it that pumpkin color.
- Black Felt: Use this to cut out shapes for the jack-o’-lantern face.
- Velcro or Elastic Bands: These will help you secure the costume around your pet’s body.
Design Instructions
- Cut the Fabric: Measure and cut the orange fabric to fit around your pet’s body. It should cover their torso comfortably.
- Add the Face: Cut out eyes, a nose, and a mouth from the black felt. Glue or sew these onto the front of the orange fabric to create a jack-o’-lantern face.
- Secure the Costume: Attach Velcro or sew on elastic bands to keep the costume in place. Make sure it’s snug but not too tight.
Comfort Tips
- Check the Fit: Ensure the costume fits your pet comfortably, allowing them to move freely. It should not be too tight around their neck or legs.
- Breathing Room: Make sure the costume doesn’t restrict your pet’s breathing. If your pet seems uncomfortable, adjust the fit or choose a different costume.
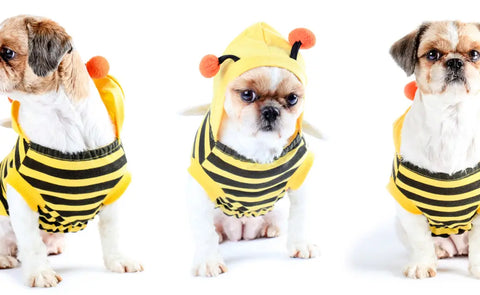
2. Adorable Bumblebee Outfit
Materials Needed
To make an adorable bumblebee outfit for your pet, gather these materials:
- Black and Yellow Striped Fabric: This will create the bumblebee’s signature stripes.
- Antenna Headbands: These will give your pet a cute bumblebee look.
- Velcro: To secure the costume and keep it in place.
Assembly Guide
- Cut the Fabric: Measure and cut the black and yellow striped fabric to fit around your pet’s body. Make sure to cover their sides with the stripes.
- Create the Body: Sew or glue the fabric together to form a tube or wrap that fits snugly around your pet. Secure it with Velcro at the back so it’s easy to put on and take off.
- Add the Antennae: Attach the antenna headband to your pet’s head. Make sure it fits comfortably and doesn’t irritate their ears or eyes.
Comfort Considerations
- Choose Lightweight Materials: Use lightweight fabric so your pet doesn’t feel weighed down. Heavy costumes can make them uncomfortable.
- Ensure a Good Fit: Make sure the costume is not too tight or too loose. It should stay in place without restricting movement or breathing.
3. Spooky Skeleton Suit
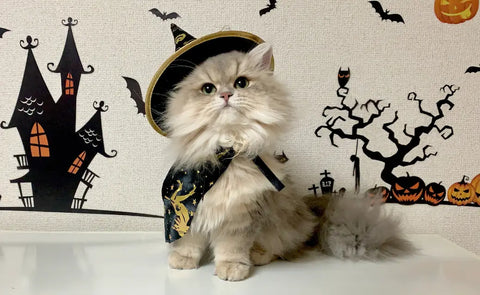
Materials Needed
To make a spooky skeleton suit for your pet, you’ll need:
- Black Fabric: This will be the base of the skeleton suit.
- White Paint or Fabric Markers: Use these to draw the bones on the fabric.
- Velcro: To fasten the costume and keep it secure.
Design Process
- Prepare the Fabric: Cut the black fabric to fit around your pet’s body, making sure it covers their sides and back.
- Draw the Bones: Use white paint or fabric markers to draw bone shapes on the black fabric. Focus on the spine, ribs, and legs to create a skeleton look. Let the paint dry completely before putting the costume on your pet.
- Assemble the Suit: Sew or glue the fabric pieces together, then use Velcro to fasten the suit around your pet’s body. This will make it easy to put on and remove.
Safety Tips
Use Non-Toxic Paint: Make sure the paint or markers you use are safe for pets. Look for non-toxic, pet-friendly options to avoid any harm.
- Check for Allergies: Before applying the paint, test a small area on your pet’s skin to make sure they don’t have any allergic reactions.
4. Superhero Cape
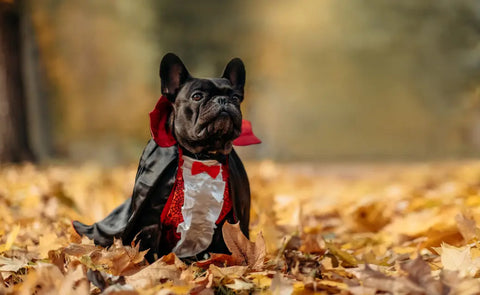
Materials Needed
To create a superhero cape for your pet, gather these materials:
- Bright Colored Fabric: Choose vibrant colors like red, blue, or green for a classic superhero look.
- Velcro: For easy fastening and adjustment.
- Fabric Glue: To attach any decorations or details.
Construction Steps
- Cut the Fabric: Measure and cut the bright-colored fabric into a cape shape that fits your pet. The cape should be long enough to flow but not so long that it trips your pet.
- Attach Velcro: Sew or glue pieces of Velcro to the top edges of the cape. This will help you fasten the cape securely around your pet’s neck.
- Secure the Cape: Attach the Velcro to close the cape around your pet’s neck. Make sure it's snug but not too tight, so your pet is comfortable.
Design Variations
- Add a Superhero Logo: Use fabric paint or iron-on transfers to add a superhero logo to the back of the cape. You can choose a classic emblem or create a personalized design.
- Customize the Cape: Add additional details like glitter or trim to give your cape a unique touch.
5. Cute Hot Dog Costume
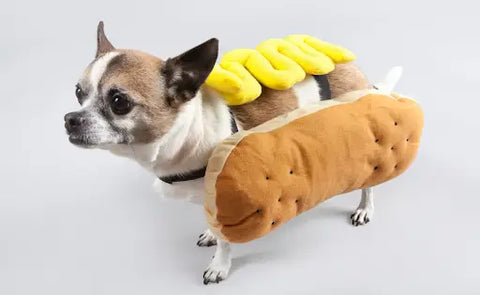
Materials Needed
To make a cute hot dog costume for your pet, you’ll need:
- Brown Fabric: This will be the “bun” of the hot dog.
- Felt: Red and yellow felt for the “ketchup” and “mustard” toppings.
- Straps or Velcro: For fastening the costume securely but comfortably.
Creation Instructions
- Prepare the Bun: Cut the brown fabric into a shape that will wrap around your pet like a hot dog bun. Make sure it’s long enough to cover their body but not so tight that it restricts movement.
- Add Toppings: Cut the red and yellow felt into squiggly lines to represent ketchup and mustard. Attach these felt pieces to the brown fabric using fabric glue. Arrange them on top of the “bun” where they would naturally go.
- Secure the Costume: Attach straps or Velcro to the ends of the fabric so you can wrap it around your pet and fasten it securely.
Fitting Tips
- Comfort First: Ensure the costume fits comfortably around your pet’s body. It should be snug but not too tight, allowing your pet to move freely.
- Check Movement: Make sure the costume doesn’t restrict your pet’s legs or breathing. Adjust the straps or Velcro to get the right fit without causing any discomfort.
6. Stylish Pirate Attire
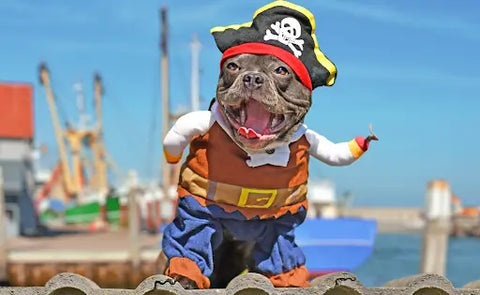
Materials Needed
To create a stylish pirate costume for your pet, you will need:
- Striped Fabric: For the pirate shirt. Choose fabric with red and white or black and white stripes.
- Faux Leather: To make a pirate belt. You can use faux leather or any other sturdy fabric.
- Pirate-Themed Accessories: A pirate hat or a small eye patch to complete the look.
Design and Assembly
- Make the Pirate Shirt: Cut the striped fabric into a simple shirt shape that fits over your pet’s body. It should be wide enough to fit comfortably but not too loose.
- Create the Belt: Cut a strip of faux leather to make a belt. Attach it around the waist of the pirate shirt using Velcro or fabric glue.
- Add Accessories: Finish the outfit with a pirate hat or an eye patch. Make sure these accessories fit well and are securely attached so they don’t fall off easily.
Comfort Measures
- Keep It Light: Use lightweight materials for the shirt and belt so that your pet can move freely without feeling weighed down.
- Ensure Proper Fit: Check that the shirt and belt are snug but not tight. They should fit comfortably without restricting your pet’s movement.
7. Cozy Dinosaur Costume
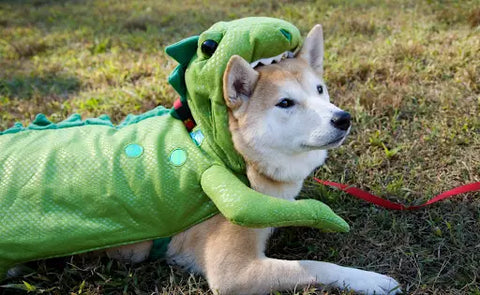
Materials Needed
To make a cozy dinosaur costume for your pet, you will need:
- Green Fabric: For the main part of the dinosaur suit.
- Felt for Spikes: Choose colors like green or contrasting colors to create the spikes.
- Adjustable Straps: To secure the costume comfortably on your pet.
Steps for Creation
- Prepare the Dinosaur Suit: Cut the green fabric into a shape that covers your pet’s body. It should fit comfortably without being too tight.
- Add the Spikes: Cut the felt into triangular shapes to make the dinosaur’s spikes. Sew or glue these spikes onto the back of the green fabric.
- Secure with Straps: Use adjustable straps to fasten the costume around your pet. This will help the costume stay in place and ensure it fits well.
Additional Tips
- Add Padding: To keep your pet comfortable, add soft padding or lining inside the costume. This will help prevent any irritation from the fabric.
- Check the Fit: Make sure the costume isn’t too tight and that it allows your pet to move easily.
8. Elegant Fairy Wings
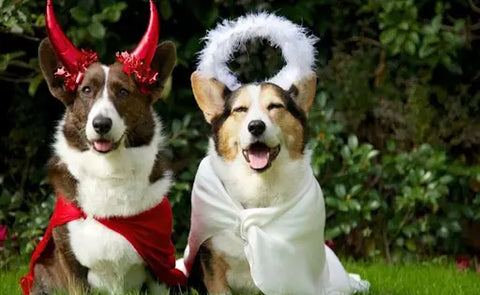
Materials Needed
To create elegant fairy wings for your pet, gather:
- Lightweight Tulle: This is the main fabric for the wings. It’s soft and light, perfect for a fairy look.
- Glitter: To add a magical sparkle to the wings.
- Elastic Bands: To attach the wings to your pet’s harness or collar.
Design Instructions
- Cut the Tulle: Cut the tulle into wing shapes. You can make them as big or as small as you like, but make sure they are proportionate to your pet’s size.
- Add Glitter: Sprinkle or glue glitter onto the tulle to give the wings a sparkling effect. Let it dry completely.
- Attach the Wings: Use elastic bands to securely attach the wings to your pet’s harness or collar. Make sure the bands are snug but not too tight.
Comfort Considerations
- Keep It Lightweight: Ensure the wings are light enough so they don’t weigh down your pet or cause discomfort.
- Check Attachment: Make sure the wings are securely attached and do not move around too much. This will help keep your pet comfortable and happy.
9. Fun Witch Hat
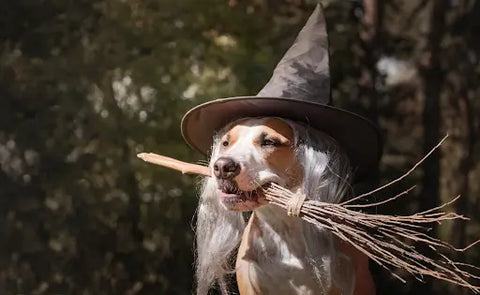
Materials Needed
To make a fun witch hat for your pet, you’ll need:
- Black Felt: This is used to make the hat. It’s sturdy and gives a classic witch look.
- A Headband: This will serve as the base of the hat.
- Fabric Glue: To attach the felt to the headband.
Assembly Guide
- Cut the Felt: Cut a piece of black felt into a triangle. The triangle should be big enough to cover your pet’s head but not too large to be uncomfortable.
- Attach to Headband: Fold the triangle into a cone shape and glue the edges together with fabric glue. Let it dry.
- Secure the Hat: Glue the bottom edge of the cone to the headband, ensuring it sticks well and is centered.
Safety Tips
- Lightweight Design: Make sure the hat is light so it doesn’t bother your pet.
- Secure Fit: Check that the headband fits snugly but comfortably on your pet’s head. It shouldn’t be too tight or cause irritation.
10. Classic Ghost Costume
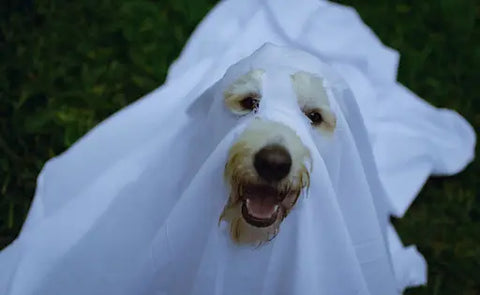
Materials Needed
To create a classic ghost costume for your pet, gather:
- White Fabric or Sheets: This will be the main part of the ghost costume.
- A Pair of Scissors: To cut the fabric.
Creation Steps
- Prepare the Fabric: Take a piece of white fabric or a sheet large enough to cover your pet.
- Drape the Fabric: Gently place the fabric over your pet, making sure it covers them fully but isn’t too tight.
- Cut Eye Holes: Use scissors to cut out two holes where your pet’s eyes will be. Make sure the holes are big enough for your pet to see through.
Fitting Advice
- Use Lightweight Fabric: Choose a light fabric so your pet stays comfortable.
- Check Visibility and Movement: Ensure the ghost costume does not block your pet’s view or movement. The eye holes should be in the right place to avoid any discomfort.
Conclusion
Including your pets in Halloween festivities with fun costumes can add an extra layer of joy to the celebration. Dressing up your furry friends not only makes them a part of the fun but also creates memorable moments for you and your family. However, it’s important to always prioritize their comfort and safety. Make sure the costumes fit well, are lightweight, and do not restrict their movement or breathing.
Once your pet is all dressed up, consider sharing their adorable Halloween look on social media. It’s a great way to spread some festive cheer and inspire others to include their pets in the holiday fun!
Check our collection of home party decors to add a special touch to your upcoming event or celebration. Shop now and discover unique pieces that will make your occasion unforgettable!


